Who can use Form ITR-2?
Individual taxpayers who do not have business or professional income can use Form ITR-2. Thus, persons having any of the following income types or fulfilling any of the criteria mentioned below are eligible to fill the form: ITR 2,
i) salary income;
ii) House property income (if there is more than one house property);
iii) capital gains;
iv) income from other sources (including lottery winnings, bets on race horses and other legal means of gambling);
v) claiming foreign assets/foreign income or any treaty relief under double taxation avoidance agreements;
vi) Where tax has been deducted at source (TDS) on certain cash payments;
vii) where income tax is deferred on employee stock option plans;
viii) agricultural income of more than Rs.5,000;
ix) Taxpayers who are not ordinarily resident and/or non-resident during the relevant financial year.
x) If a taxpayer is a director in a company or has invested in unlisted common share
ITR Filing Mode
A taxpayer is required to submit Form ITR-2 electronically. This can be done completely through online method or partly online and partly offline. In the latter mode, one needs to download the pre-filled JSON file and use the JSON utility to fill in the details, so that it can be uploaded to the Income Tax e-filing website to complete the filing process .
pre-filled information
Form ITR-2, if filed completely online, comes with certain pre-filled information like personal details, salary income, capital gainDividend income, interest income, etc. However, if you use the partially online and partially offline method, the pre-filled data will need to be imported into the JSON utility.
Step by step process to file Form ITR-2 in complete online mode
1. Visit www.incometax.gov.in and login with your credentials. Your PAN/Aadhaar number is the User ID for login.
2. Go to e-File > Income Tax Returns -> ‘File Income Tax Return’ to be selected from the menu.
3. Select the Assessment Year (AY 2022-23), Mode of Filing (Online), Applicable Status (Individual) and ITR Form (ITR-2) on the landing page and click on “Let’s Get Started”.


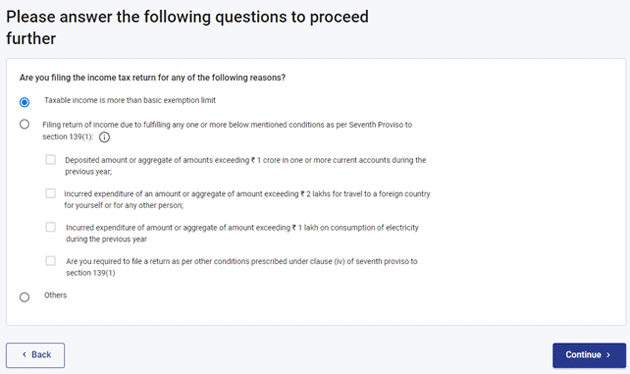
4. Select the applicable reason for filing the return of income as shown below and select ‘Continue’.
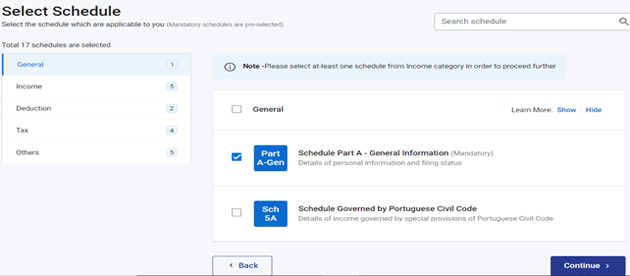
On the next page, a person has to select the schedule that applies to the income. On the left side of the page, it is divided into 5 categories – General, Income, Deduction, Tax and others.
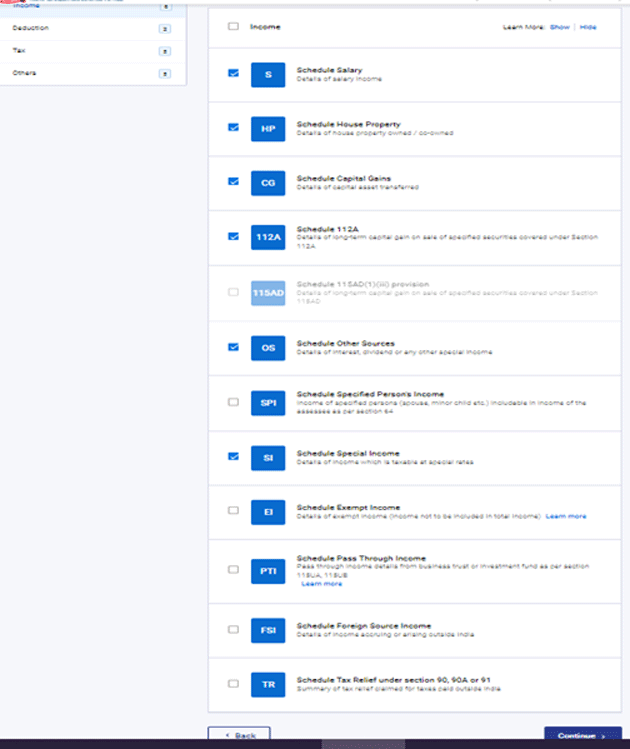
Select Schedule ‘General’ from the left and choose the one that is applicable to you. Similarly, select Schedule ‘Income’ and select the options which are applicable to you like Salary, House Property, Capital Gains, Other Sources etc.
It is important to note that broadly applicable schedules like Salary, House Property, Deductions etc. are selected by default in the pre-filled ITR, one has to (on one’s own) all specifically applicable schedules like Schedule FA, AL, Exemption Income etc. has to be selected. Based on his source of income, disclosure and reporting requirements and click “Continue”.
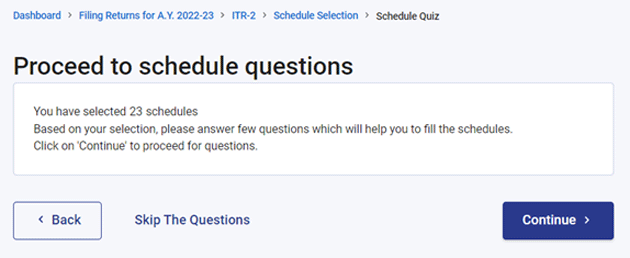
In the next page “Proceed to schedule question”, click “Continue”
5. On the next page, taxpayers can see general information, questions on salary exemptions and deductions.
General Information: The taxpayer should opt for the tax regime as per his/her choice (old or new) and click on ‘Continue’.

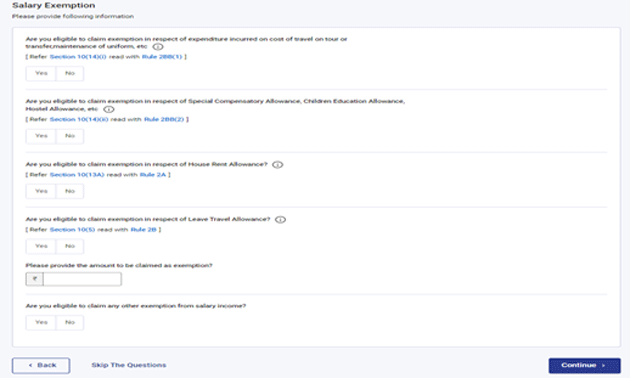
Salary Exemption: In this tab, the taxpayer has to select the eligible salary exemption (like House Rent Allowance, Leave Travel Allowance etc.) and click on ‘Continue’ to proceed. The taxpayer also has the option to skip these questions and the ITR Form will capture the exemption details directly from Form 16. If the income already entered is correct, then confirm it. If incorrect, edit it and correct the information.
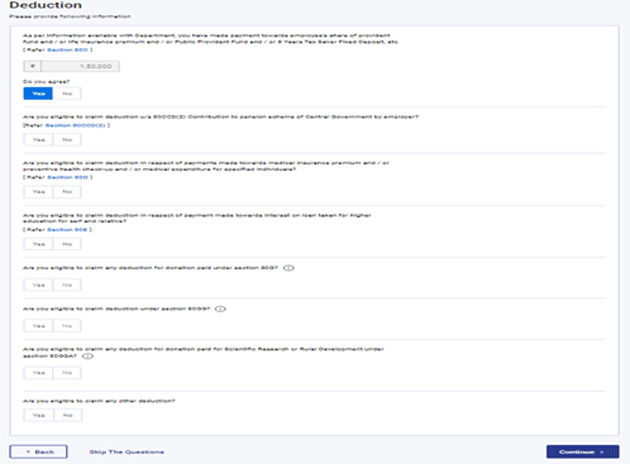
Deduction: In this tab, the taxpayer has to select the eligible deductions (like life insurance premium, medical insurance premium etc.) and click on ‘Continue’. The taxpayer also has the option to skip these questions and the ITR Form will directly capture the deduction from Form 16, however, if no deduction has been claimed through the taxpayer’s payroll, it can be claimed by filing Schedule Deductions. Is. Keep in mind that these deductions can be claimed only if you have selected the old tax regime in the first tab. If you have opted for the new tax regime, you cannot claim any deduction other than the deduction under section 80CCD(2).
6. On the next page, the taxpayer will see a summary of all the schedules, and will have to fill and validate all these tabs to proceed:
- PART A – GENERAL INFORMATION: In this tab, the taxpayer has to verify the pre-filled data from his e-filing profile. Personal information, contact details, filing status and bank details will be pre-filled in this form. The taxpayer has to select the applicable nature of employment from the drop-down menu and other mandatory fields.

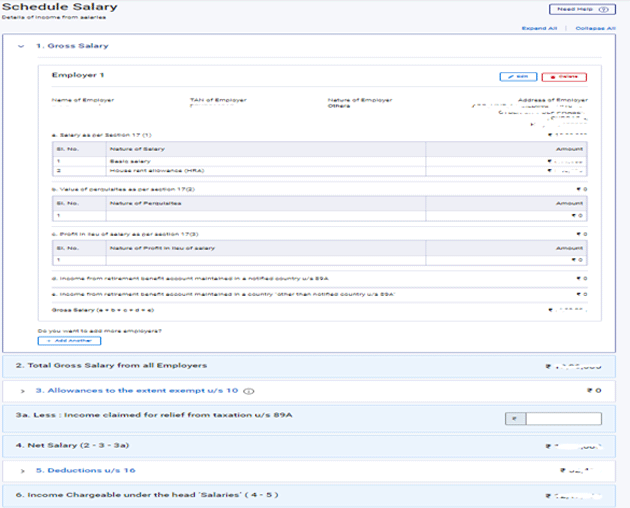
- Schedule Salary: This data will be pre-filled on the basis of Form 16, thus, the taxpayer should verify whether the income statement, deductions and tax-exemptions claimed through the employer are correctly reported or not. Also, the salary is required to be mandatorily provided in this schedule in various components like basic pay, house rent allowance etc.
- Schedule House Property: The details of rental income, interest on self-occupied house property and housing loan will be pre-filled on the basis of Form 16. However, it is advised to validate the already filled details before proceeding further. If not already filled, necessary details of let out and self-occupied properties respectively should be provided.

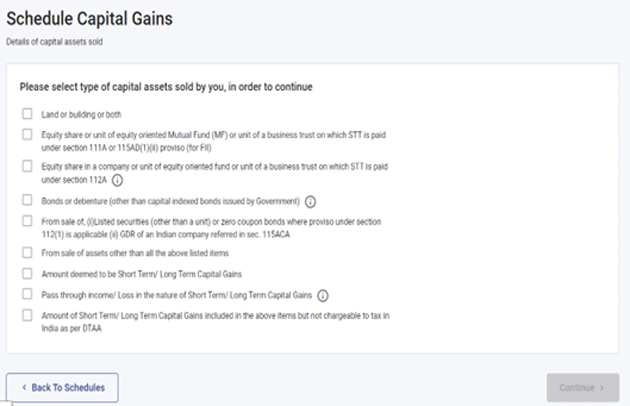
- Schedule Capital Gains: Capital gains arising from sale/transfer of different types of capital assets have been segregated on the basis of their nature, hence the taxpayer has to select the capital asset sold/transferred from the category and then continue to enter the transaction details have to click on. In a case where a capital gain arises from the sale or transfer of more than one capital asset, which are of similar nature (such as foreign equity and/or equity shares of an Indian company), the capital gains in respect of all such capital assets Benefits are to be reported in a consolidated form. However, in case of transfer of land/building, it is mandatory to calculate the profit from each asset separately. Further, if the equity shares of a company or a unit of equity-oriented mutual fund or a business trust, on which STT has been paid, are purchased on or before January 31, 2018, the details of each transfer will be details-wise Enrollment is mandatory.
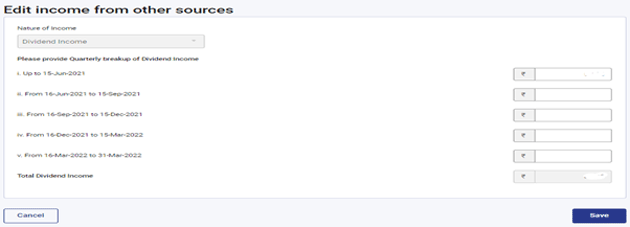
- Income Schedule from Other Sources Interest income from savings bank accounts and fixed deposits, recurring deposits, dividend income (to be reported quarter-wise), interest earned on contributions to provident fund up to taxable extent, income from retirement benefit account maintained in a notified and Also other notified countries etc are required to report under this schedule.
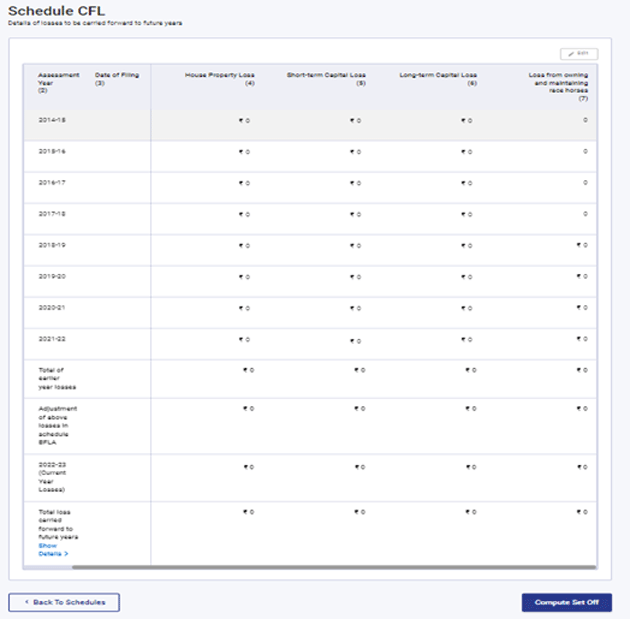
- Schedule Carry Forward Loss (CFL): In case of any further loss from previous years, the taxpayer should fill out this schedule to adjust such loss from current year’s income to the extent available and carry forward the balance to future years.
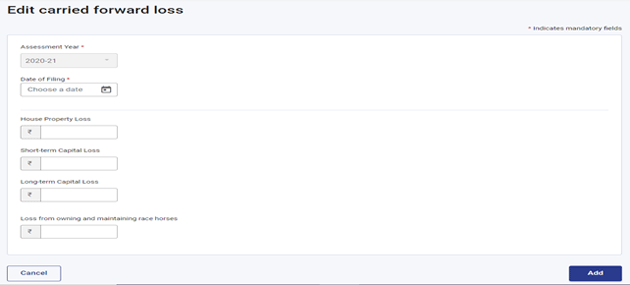
One should select the relevant assessment year and fill the ITR of the previous year (filed on or before the due date) for further loss as detailed below:
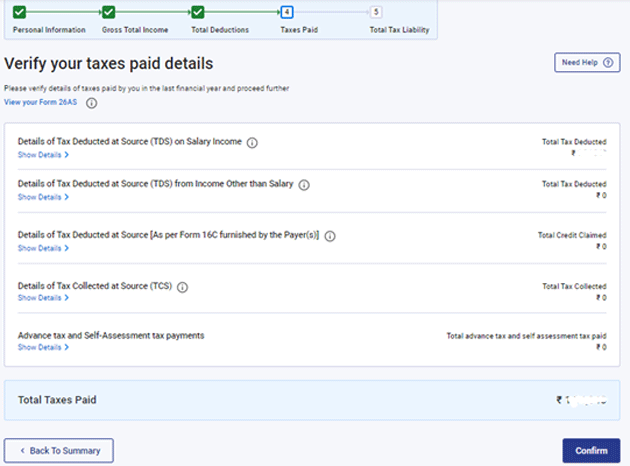
- Tax Paid: The details in this tab will be pre-filled from Form 26AS/AIS along with TDS, Advance Tax and Self-Assessment Tax, if any, paid by the taxpayer. The taxpayer has to validate the details and click on ‘Confirm’.
- PART B TTI: This tab shows the calculation of tax liability on the total income and the taxpayer can view the tax summary (Nil Payable/Refund) of the tax return. Once all the schedules are “confirmed” and the Part B TTI is verified, the taxpayer has to click on the “Preview Return” for declaration tab.
- Announcement tab: Once all the details are filled in the form, the taxpayer is required to fill in the requisite details in the declaration, confirming that all the details provided in the return are accurate and complete. After confirmation, click on ‘Proceed to Preview’, here the taxpayer can download the ITR draft and if all the details are correct, the taxpayer can click “Proceed to Verify”, If a list of errors is shown, the taxpayer can click on each error to correct the same. If there is no error, the taxpayer can click ‘Proceed to Verify’,

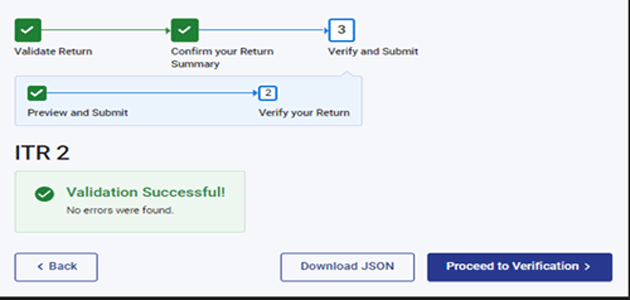
Verification: After successful verification, the taxpayer can proceed to verify the tax return electronically through Net Banking, Aadhaar OTP etc. or can take a printout of ITR-V (Acknowledgment) and sign it manually And send it to CPC, Income Tax Department, Bangalore. Within 120 days of e-filing it.
Note that the signature should be in blue ink and you can send the ITRV through speed post or normal post only. ITR-V cannot be sent by courier or registered post.
(The author is Partner and Head, Global Mobility Services – Tax, KPMG in India.)
